 Skip to content
How To: Reset Your Oil Gauge
A floating oil gauge can sometimes become stuck and miscalculate the accurate level of oil in your tank. Resetting a floating oil gauge on an oil tank can be a simple task, however it varies depending on the type of gauge that is installed on your tank. In general, here are some steps you can follow to reset a floating oil gauge:
- Locate the gauge: The floating oil gauge is typically located on top of the oil tank. It may be attached to a cap or may be separate.
- Remove the cap or the gauge: If the gauge is attached to a cap, twist the cap counterclockwise to remove it. If the gauge is separate, you may need to use a wrench or pliers to remove it.
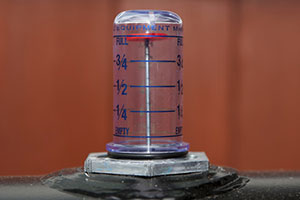
- Reset the gauge: The gauge typically has a bobber attached to a needle. The bobber may be yellow or red. Firmly press the bobber down until it reaches the bottom, then let go of it. It should float back up to the accurate oil level.
- Replace the gauge or the cap: Once the gauge is reset, replace the gauge or the cap on the tank.
It’s important to note that some oil tanks have gauges that are connected to a monitoring system that automatically tracks the oil level in the tank. In this case, you may not need to reset the gauge manually.
If you are unsure about how to reset the floating oil gauge on your oil tank, or if you encounter any issues during the process, it’s best to contact our Service Department for assistance.